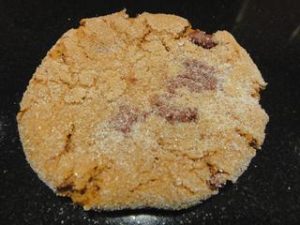
Spiced Apple Yogurt Quinoa Cookies with Vanilla Maple Drizzle

Written by Tad. Posted in Cookies

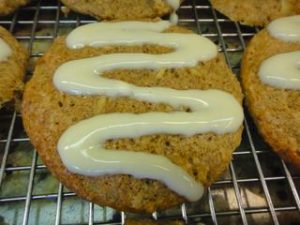
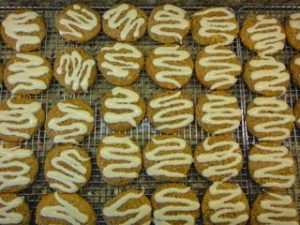
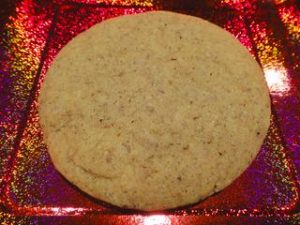
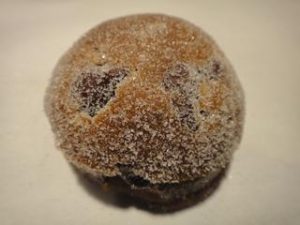
This recipe was forwarded to me by Dr. Al’ai. He pays a lot of attention to may recipes but never tries to make any of them himself. I ran into some challenges in finding the ingredients. I couldn’t white wheat flour anywhere. I finally got some white wheat from a friend and ground it into flour myself. I couldn’t find the kind of yogurt the original recipe recommended nor apple yogurt of any kind until my wife finally came across some at a grocery store we usually don’t go to. I chose to use brown sugar rather than palm sugar. In the end, they turned out well. They are soft, cake-like, and mine had a strong flavor the the Chobani Cinnamon Apple yogurt.

Recipe By:

Adapted from The Foodie Physician

Ingredients:

1½  cups white whole-wheat flour, (use all-purpose if you need to)
¼ cup ground flaxseed
½ teaspoon baking powder
½ teaspoon baking soda
1½  teaspoons cinnamon
½ teaspoon nutmeg
½ teaspoon kosher salt
1 cup cooked quinoa, cooled
¼ cup coconut oil or unsalted butter, softened
½ cup packed coconut palm sugar, or brown sugar
5.3 ounces Spiced Apple 2% yogurt
1 large egg
1 teaspoon vanilla extract
1 large apple, peeled and grated (about ¾ cup) * SEE NOTE
Vanilla Maple Drizzle:
1/4 cup vanilla yogurt
1 tablespoon pure maple syrup

Directions:

1. Preheat oven to 350°F.

2. Line two baking sheets with parchment paper. Whisk the flour, flaxseed, baking powder, baking soda, cinnamon, nutmeg and salt together in a large bowl.  Add the quinoa and whisk to coat all of the grains with the flour mixture.

3. Using an electric mixer, beat the coconut oil and sugar together until well combined.  Beat in the Spiced Apple yogurt, egg and vanilla.  Squeeze all of the water out of the grated apple and add the apple to the wet ingredients, mixing to combine.

4. Add the flour mixture to the mixer and mix until just combined.

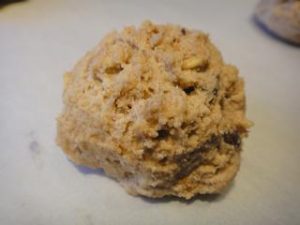
5. Spoon the dough (about 2 tablespoons each) onto the prepared sheets.  Flatten them slightly with your a drinking glass. Butter the bottom and dip in sugar. Redid after each flattening.  Bake until golden, 15-18 minutes.  Transfer cookies to a wire rack and let cool.

6. To make the Vanilla Maple Drizzle, stir the vanilla yogurt and maple syrup together in a bowl.  Drizzle the glaze onto the cookies with a spoon.  Alternatively, you can pipe the glaze on.  To do this, pour the glaze into a small plastic bag and seal it.  Cut off a tiny corner and squeeze to drizzle the glaze on the cookies.  Store cooled cookies in an airtight container in the refrigerator.

Notes:

* I used Granny Smith

Ranger Bars

Written by Tad. Posted in Cookies


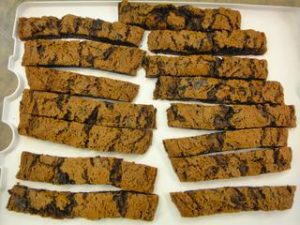
When I offered these to Dr. Pete last night, he asked what was in them. When I told him, he said he needed to time eating them, implying that he wanted to get home before the prunes worked on him. Why is it that prunes have such a functional reputation? Please don’t wait until you have bowel problems to try these delicious cookies.

These cookies are very moist, soft and very sweet. They were well received by the staff in the emergency department.

Recipe By:

San Jose Mercury News

Yield:

24

Ingredients:

2 cups flour, plus 2 tablespoons
2 teaspoons baking soda
1 1/2 teaspoons ground ginger
2 teaspoons cinnamon
1/4 teaspoon salt
9 tablespoons unsalted butter, at room temperature
1 cup light brown sugar, lightly packed
1 large egg
1/4 cup unsulphured molasses
1 1/2 cups prunes, chopped
3/4 cup raisins

  Directions:

1. Heat oven to 375 degrees. Line a baking sheet with parchment paper.

2. Sift together flour, baking soda, ginger, cinnamon and salt. Set aside.

3. Using an electric mixer, beat together butter and sugar.

4. Add egg and beat until combined.

5. Add molasses and beat, scraping down sides of bowl.

6. Slowly add dry ingredients, chopped prunes and raisins.

7. Mix until dough comes together, about 1 minute.

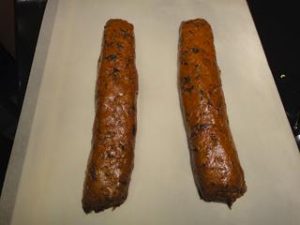
8. Divide dough in half. Shape each half into a log that is 12 inches long and 1½ inches in diameter.

9. Arrange logs on prepared baking sheet, 3 inches apart. * SEE NOTE

10. Bake until golden and puffy in the center, but still very soft to the touch, about 20 minutes. The logs will flatten out as they bake. Cool logs on baking sheet.

11. Slice into 1-inch pieces on a slight diagonal.

Notes:

* I found this to be a lot harder than you would think from the way this is written. The dough is very soft and sticky. I had to put the dough into plastic wrap in order to form the log, the carefully roll the log our of the plastic wrap onto the parchment. Don’t even think of trying to move or reposition the log after it is down on the parchment. This was such a pain that, next time, I would just try scooping them with a cookie scoop.


$250.00 Plus Cookies

Written by Tad. Posted in Cookies


I want to tell you about the cookies I made today to take to the emergency department. These cookies were wonderful but could never be recreated. Let me tell you why.

I was organizing my cupboard and was embarrassed to find a few things I really wanted to get rid of so I decided to put them in cookies.

1. Almost a pound of See’s Bordeaux. These are my wife’s favorite. I bought them for her for her birthday. She enjoyed a few then renewed her dietary determinations and never ate them. After six months, they were hard and not fit to eat.

2. A bag of Cadbury caramel-filled chocolate eggs. I guess I bought them on sale after last Easter. After almost nine months in the cupboard, something needed to be done with them.

3. Half a milk chocolate-bacon bar. I bought this on a lark. Even though it was good chocolate, I didn’t like it enough to finish it off.

4. A blob of left-over filling from the Chocolate Chipotle Cookies With Smoky Salted Caramel that I recently posted.

So, I had my goodies identified. What recipe to put them in? I went to my blog and took a look at all the recipes I have posted to find a good candidate. As if happens, the first recipe on the list is $250.00 Cookies. They are pretty basic oatmeal chocolate chip cookies but they also call for shredded milk chocolate. A great target for my creative cupboard cleaning.

I mixed up the butter, sugars, eggs and vanilla, just like usual. Then I chopped up the caramel-milk chocolate eggs and the bacon chocolate bar. I threw the Bordeaux into the food processor and, since they were dry, they ended up almost powdered. I then threw the chopped eggs, the bacon chocolate bits, the powdered Bordeaux and the blob of left-over filling into the butter mixture. I then mixed them in really well.

I followed this with the powdered ingredients, then the chocolate chips, as usual in the recipe.

I scooped them and baked then as recommended in the recipe.

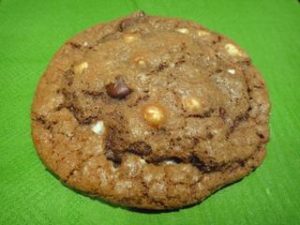
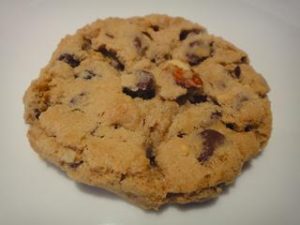
They came wonderfully. They are good looking cookies. They are very sweet and have a nice chew. And, they can never be reproduced.

This is one of the reasons I like baking cookies so much. You can follow a recipe exactly for the exact result every time. Or, you can scheme on something crazy and see how it turns out. What fun!


Hot Cocoa Cookies

Written by Tad. Posted in Cookies


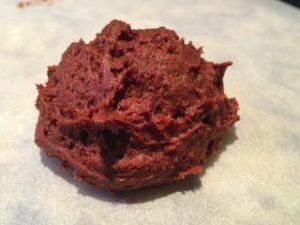
My daughter, McKenzie sent me this recipe and they are wonderful. They mixed up easily and looked great. They are rich and tasty, even though they are not so dark a chocolate because of using hot chocolate mix rather than cocoa powder.

Recipe By:

lovefromtheoven.com

Yield:

36

Ingredients:

1¼  cups butter, at room temperature
1 cup sugar
⅔ cup brown sugar
2 eggs
1 teaspoon vanilla
3¼ cups flour
4 packs hot chocolate mix (not sugar free)
1 teaspoon salt
1¼ teaspoon baking soda
1 teaspoon baking powder
1 cup chocolate chips
1 cup Marshmallow Bits,  * See Notes

Directions:

1.  Heat oven to 350 degrees F.

2. Cream together butter and sugars until light and fluffy.

3. And eggs and vanilla. Blend well.

4. In a separate bowl, mix together dry ingredients, including hot chocolate mix.

5. Add dry ingredients a little at a time to wet ingredients.

6. Stir in chocolate chips and marshmallow bits.

7. Drop onto cookie sheets in 2 tablespoon balls.

8. Bake 10-12 minutes. Allow to cool for approximately five minutes before removing from cookie sheet.

Notes:

* Original recipe says you can use mini marshmallows. If you do, they will turn out completely different. The Bits keep their integrity whereas mini marshmallows melt and caramelize. Both have their appeal but they are not equivalent. Unfortunately, the Bits are harder to find. Nob Hill and Lucky, the two grocery stores closest to us don’t carry them but I was able to find them at Safeway.

Chocolate Chipotle Cookies With Smoky Salted Caramel

Written by Tad. Posted in Cookies


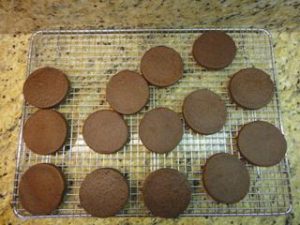
Don’t bake these if you want a subtle, light cookie. These really get in your mouth. First, the flavors. Chocolate from lots of cocoa. Smoke from chipotles and smoky sea salt. Bight from chipotle and black pepper. Oh, and some cinnamon. Then, they are pretty sweet and quite salty. Don’t plan on eating more than one.

Recipe By:

Mercury News

Yield:

8 sandwich cookies

Ingredients:

1½ cups sifted all-purpose flour, 4.5 ounces
¾ cup sifted unsweetened high quality cocoa powder, 2.25 ounces
1 teaspoon ground cinnamon
½ teaspoon ground chipotle pepper (or ⅛ teaspoon smoked paprika or cayenne)
½ teaspoon kosher salt
¼ teaspoon ground black pepper
½ cup unsalted butter, softened
1 cup granulated sugar
1 egg
2 teaspoons pure vanilla extract
1 tablespoon cocoa nibs, chopped (optional)
1 cup cream
½ cup sugar
¼ cup water
Pinch of cream of tartar
½ teaspoon smoked or sea salt

Directions:

1. Heat oven to 325 degrees. Cut parchment to fit baking sheet(s).

2. Sift together flour, cocoa, cinnamon, chipotle, salt and pepper.

3. Using electric mixer, cream butter and 1 cup sugar for 3 minutes. Add egg and vanilla. Mix until blended.

4. Add dry ingredients and cocoa nibs. Beat on low speed just until incorporated. Don’t over mix.

5. Shape dough into 2 disks. Wrap in plastic wrap. Freeze dough for 10 minutes to firm. (I didn’t find this to be needed.)

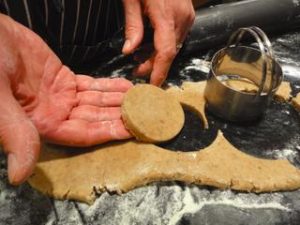
6. Using a rolling pin, roll out dough ¼-inch thick. Using a cutter, cut out cookies. Transfer to prepared baking sheets. Bake until cookies are soft to the touch and no longer shiny, 8 to 10 minutes. Cool on pans for 2 minutes. Transfer to a rack to finish cooling.

7. For caramel sauce: In small saucepan set over medium heat, reduce the cream to ¾ cup. Set aside.

8. In another small saucepan, combine sugar, water and cream of tartar. Bring to a boil — do not stir — and cook until the caramel turns an amber color. (You can do this on high heat but just watch because the time from amber to burnt is very short.) Remove from heat.

9. Carefully add reduced cream and smoked salt, stirring until smooth. Cool completely.

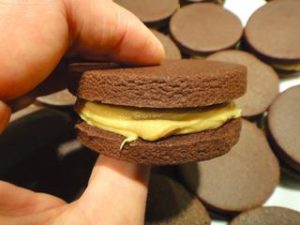
10. To assemble: Place a dollop of caramel on a cookie. Top with a second cookie to form a sandwich. Repeat with remaining cookies.

Notes:

Make sure to reduce the cream to at least ¾ cup. If the cream is too runny, the caramel will be, too, and they will be a mess. I even had to add some powdered sugar to them caramel one time to keep it from running out of the cookies.

Speculoos Cookies

Written by Tad. Posted in Cookies

A few years ago, our kids took us to eat Belgium waffles at Bruges Waffles & Frites in downtown Salt Lake City. One option to top the waffles was speculoos cookie butter. Every since that tasty introduction, speculoos cookie butter has been a part of our lives. When we first started to eat it, I had to order it online. Now, we can buy it at our local Nob Hill or Trader Joe’s. It is basically peanut butter made by grinding vegetable oil with crunchy speculoos cookies instead of peanuts. Here is a recipe to try to reproduce those spicy, crunchy cookies.

Recipe By: King Arthur Flour
Yield: 24-48

Ingredients:

1 1/2 cups King Arthur Unbleached All-Purpose Flour
1/2 cup toasted almond flour, or almond flour
1/4 teaspoon baking soda
3 1/2 teaspoons cinnamon
1/4 teaspoon nutmeg
1/8 teaspoon ginger
1/8 teaspoon white pepper
1/8 teaspoon aniseed powder
1/8 teaspoon cardamom
1/2 teaspoon salt
1/2 cup unsalted butter, at room temperature
3/4 cup granulated sugar
1 teaspoon vanilla extract
1 large egg

Directions:

1. In a small bowl, combine the flours, baking soda, spices and salt. Set aside.

2. In a large mixing bowl, mix together the butter and sugar. Add the vanilla and egg. Mix until well blended.

3. Stir in the flour mixture.

4. Form the dough into two disks, wrap in plastic, and refrigerate for 2 hours or more.

5. Lightly grease (or line with parchment) two baking sheets.

6. Working with one disk at a time, roll the dough 1/8″ to 1/4″ thick.


7. Use any shape cookie cutter to cut out shapes.


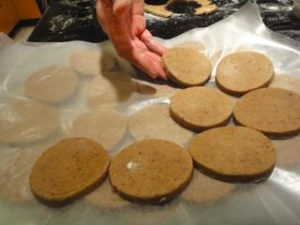
8. Transfer the cookies to the prepared baking sheets and freeze for at least 30 minutes. This helps the cookies retain their shape while baking.* See Notes.

9. Fifteen minutes before baking the cookies, heat the oven to 300°F.

10.  Bake the cookies for 25 to 30 minutes, until they’re light gold around the edges. Remove them from the oven, and cool them right on the pan.

Notes:

My baking sheets will not fit in my freezer. I have to place the cut-out dough on a plate covered with wax paper and place the plate in the freezer.

Curry Granola Chocolate Chip Cookies

Written by Tad. Posted in Cookies

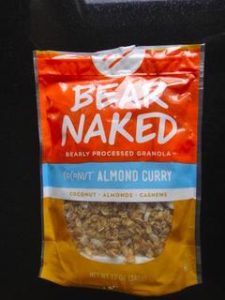
A friend of mine, Janine, brought me a bag of curry-flavored granola. She bought it but the curry flavor was a bit too much for her. I used it, rather than the oatmeal I usually put in my trademark chocolate chip oatmeal recipe. It was subtle but a couple of people in the emergency department immediately recognized the unusual flavor. I think I will try it again with some other kind of granola. Thanks, Janine!


Serving Size: 72

Ingredients:

1 cup shortening
1 cup butter, softened
1  1/2 cups sugar
1  1/2 cups brown sugar
1 tablespoon vanilla
2 eggs
3 cups flour, 14.5 ounces
2 teaspoons soda
1  1/2 tsp cinnamon
3 cups curry-flavored granola
4 cups chocolate chips

Directions:

1. Heat oven to 350 degrees.

2. Cream butter and sugars until fluffy.

3. Beat in eggs and vanilla.

4. In separate bowl, sift together flour, soda and cinnamon.

5. Stir flour mixture into sugar mixture.

6. Stir in chocolate chips and granola.

7. Form into balls on cookie sheets.

8. Bake 13 minutes or until just turning brown on the bottom and around the edges.


Hot Chocolate Cookies

Written by Tad. Posted in Cookies


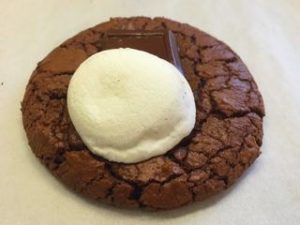
I got this recipe from my sister-in-law, Kim. I have shared other recipes on this blog that I got from her and here is another good one. They are VERY rich and chocolatey. The marshmallow and piece of chocolate on top make them look really cool and they have a great texture. Fun cookies! Thanks, Kim!

Recipe By:

Adapted from Averie Cooks

Ingredients:

½ cup unsalted butter
12 ounces semi-sweet chocolate chips
1¼ cups light brown sugar, packed
3 large eggs
2 teaspoons vanilla extract
¼ cup unsweetened cocoa powder
1¼ cups all-purpose flour
1½  teaspoons baking powder
¼ teaspoon salt
8 ounces dark chocolate, diced into ½ -inch pieces
12 large marshmallows, cut in half

Directions:

1. Heat oven to 325F. Line a baking sheet with a Silpat or parchment or spray with cooking spray.

2. To a medium, microwave-safe bowl add butter and chocolate chips. Heat on high to melt for 1 minute. Stop to check and stir. Heat in 15-second bursts, stopping to stir after each burst, until chocolate has melted and can be stirred smooth. Allow melted chocolate mixture to stand for 5 minutes to cool slightly.

3. To a separate large bowl add brown sugar, eggs, and vanilla. Beat with a handheld electric mixer on medium speed just until blended, about 1 minute.

4. Add cooled chocolate mixture and beat on medium speed until just until combined, about 1 minute. Stop and scrape down the sides of the bowl.

5. Add cocoa powder, flour, baking powder, and salt. Beat on low speed just until combined, about 1 minute. Stop and scrape down the sides of the bowl.

6. Using a 2-tablespoon cookie scoop, form dough balls and place them on the baking sheet, spaced at least 2 inches apart. Bake for 10 minutes, or until edges and tops have just set, even if slightly undercooked and glossy in the center.

7. Remove baking sheet from oven, add 1 piece of dark chocolate to the center of each cookie, pushing down very slightly just so it breaks the surface and sinks down.

8. Place one marshmallow half on the top of each piece of chocolate on all the cookies, pushing down very slightly so the marshmallow adheres.

9. Return baking sheet to oven and bake for about 5 minutes, or just until marshmallows have puffed; don’t let them brown and don’t over-bake. Allow cookies to cool on baking sheet for about 10 minutes before serving.

Notes:

Chocolatey? I made a triple batch for the ED so that was 36 ounces of chocolate chips as well as the ¾ cup cocoa and the chocolate on the top.

McKenzie, My Baking Buddy

Written by Tad. Posted in Cookies, Uncategorized

One of the things I really enjoy about baking is being organized and in control. I move through the kitchen smoothly and efficiently, timing my activities for best results. It fits my personality and pleases me. This is best done alone or with a capable assistant.

Our youngest daughter, McKenzie, took a very early interest in my baking. Whenever she realized I was getting things out to bake, she would come straight into the kitchen and ask, “Can I help?”

I am embarrassed to say that, at first, this set me back a bit. Inside, I would groan at the challenge this would be to my baking efficiency. I am not embarrassed to say, however, that my priorities always put her and our relationship above those selfish feelings that drove me to groan inside at having a little, inexperienced assistant in my pursuit of baking efficiency.

Every time I baked with McKenzie, I really enjoyed it and the result was that she was not only a great baking companion but became a very capable baker in her own rights.

The other day, we discovered a paper she wrote for a middle school English writing assignment. It warmed a father’s heart to see how well she wrote and how much she had taken baking into her own heart. With her permission, I share it with you today.

By way of explanation, she said, “I would have been in 7th or 8th grade (2002 or 2003.) It’s funny, when I read this I thought, ‘This must have been for Mr. Hanes’ English class.’ His writing style and lessons stick out the most in my memory. He was huge on how you structure your essays, with intros, transition sentences, main points 1, 2 and 3… It’s funny to read and see me trying and follow those principles precisely.” This explains the nature of this essay so well.


How to Make the Best Chocolate Chip Cookies

The sweet chocolate chips mixed with the tangy vanilla… This is how you make one of the best chocolate chip cookies in the world. The first step is to get all of the ingredients together. Next, you have to mix them, and last is a few secrets to make them better. The first step is all of the ingredients.

You have some dry, and some wet ingredients in these cookies. It calls for 3 cups of flour, 1½ teaspoons of cinnamon, 2 teaspoons of baking soda, 3 cups of oats, 3 cups of chocolate chips, and 1½ cups of white sugar and the same for brown. The wet ingredients are, 1 cup of real butter, 1 cup of shortening, 2 eggs, and 1 tablespoon of vanilla. The next thing you have to do is mix them together.

All of these ingredients must go in a special order. First, is the butter, shortening, and sugars. You let them mix up really well. Then, you add your eggs and vanilla and mix well. Next, you put in all of the dry ingredients. The last two steps are the chocolate chips and then the oats. There are a few more details to make perfect cookies.

I have a few secrets to my success. The first one is I do not cook them for a set time. I cook them until they are slightly brown on the edges. The second one is to soften the butter so that it mixes in easily. The last and most important is not to use Quick Oats! All of these useful tips will help make great cookies.

There are many ways to make cookies but there is only one real way. Three steps to make these wonderful cookies are last, my secrets, next, the order you mix them up and first, the ingredients that you use. This is how you make the best chocolate chip cookies in the world.

Black Dog Ginger Cookies

Written by Tad. Posted in Cookies


I got this recipe from my daughter-in-law, Elizabeth. My favorite ginger cookie, without a doubt, is the Taku Ginger Cookie. Takus are chewy whereas these are very dense and firm.  I twisted this recipe, as I so often do, by adding chocolate chips. That causes a complication in that the dough is already stiff and doesn’t flatten out very well. Filling it full of chocolate chips only makes them less likely to flatten out. They are really good! (But not at good as Taku Ginger Cookies.)

Recipe By:

Elizabeth

Ingredients:

½ cup coarsely chopped fresh ginger
1½ cups canola oil, divided
4 cups granulated sugar, divided
¾ cups molasses
3 eggs
1½ teaspoons salt
1 tablespoon cinnamon
5¼ teaspoons baking soda
¾ teaspoon ground cloves
7 cups flour
3 cups semi-sweet chocolate chips

Directions:

1. Heat oven to 350°.

2. Mix fresh ginger with ½ cup of the oil in a food processor until well-minced. Strain out the fiber and throw it away. Set aside the ginger-infused oil.

3. In a large mixing bowl blend 3 cups of sugar, molasses and eggs.

4. Add ginger oil plus the remaining 1 cup of oil to the egg mixture and blend until smooth.

5. In a separate bowl, mix together the salt, cinnamon, baking soda, cloves and flour.

6. Add the dry mix to the wet mix and blend well.

7. Stir in chocolate chips.

7. Line  cookie sheets with parchment paper.

8. Scoop the cookie dough into 2 tablespoon balls and roll in the reserved 1 cup of granulated sugar.

9. Place on prepared cookie sheets and bake for about 8-12 minutes. About half way through, remove them quickly from the oven and flatten each ball with the buttered bottom of a drinking glass, dipping it into sugar between each flattening, the return quickly to the oven to finish baking. Bake just until the tops crack and the cookies are flat. They will look raw even after 10 minutes even though they are golden brown. They will stiffen up. The original recipe calls for you to drop the baking sheet onto the counter three times as you take them out of the oven, so they flatten even more.

10. Cool completely on wire racks.

Copyright © 2014 Bad Tad, MD